
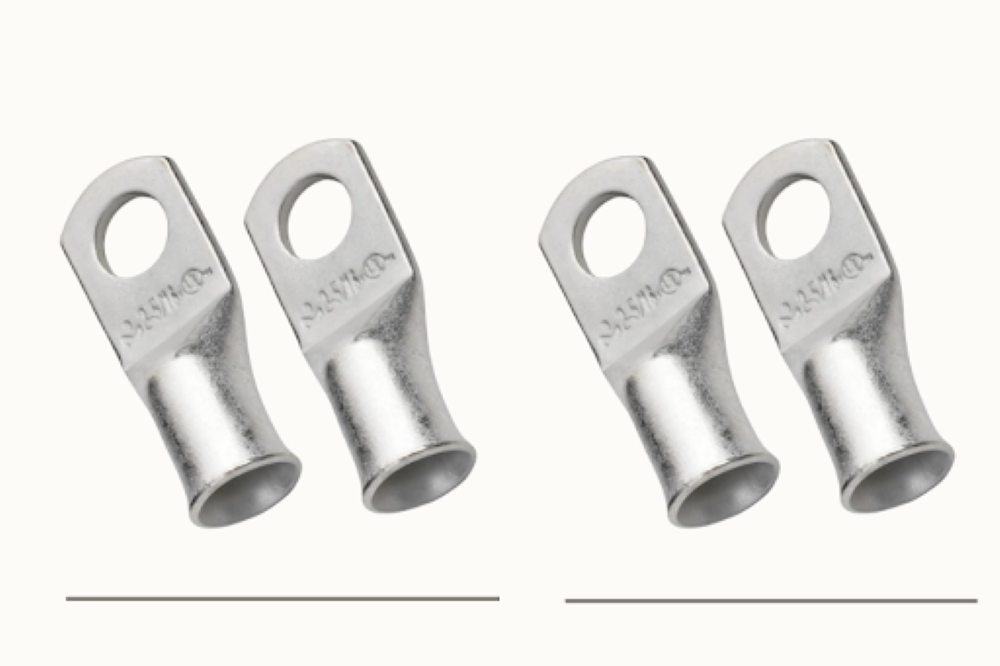
When it comes to high-current electrical systems—whether in marine environments, automotive power upgrades, or solar battery banks—the integrity of your connections is the difference between a high-performance system and a potential fire hazard. The 2 AWG tinned lug (also known as a 2 gauge tinned lug) is a staple in these builds because of its ability to carry significant amperage while resisting the creeping threat of oxidation.
However, simply having the right lug is only half the battle. The electrical industry often says, “A lug is only as good as its crimp.” A poor crimp creates high resistance, leading to heat buildup, voltage drop, and eventual failure.
In this guide, we will dive deep into the professional techniques required to master the installation of 2 AWG tinned lug.
Why Use Tinned Lugs for 2 AWG Applications?
Before picking up your crimping tool, it is essential to understand the material. A 2 gauge tinned lug is typically made from high-purity electrolytic copper that has been electroplated with a thin layer of tin.
- Corrosion Resistance: In humid or saltwater environments, bare copper oxidizes quickly, forming a layer of non-conductive crust. Tinning prevents this.
- Longevity: Tinned lugs maintain a lower resistance over time, ensuring your 2 AWG wire (which is roughly 0.25 inches in diameter) delivers full power to your components.
Step 1: Selecting the Right Tooling
For a wire as thick as 2 AWG, “crushing” the lug with a hammer and a chisel is not an acceptable technique. You need a tool that provides 360-degree compression or a specialized hexagonal die.
1. Hydraulic Crimpers
This is the gold standard for 2 AWG tinned lugs. Hydraulic crimpers use several tons of pressure to “cold weld” the wire strands to the lug casing. This eliminates air gaps within the barrel.
2. Heavy-Duty Mechanical Lug Crimpers
These long-handled tools use leverage to compress the lug. While effective, they require significant physical strength and often use a “point” or “nest” crimp rather than the preferred hexagonal shape.
3. Hammer-Slam Crimpers
While popular in DIY circles, these are the least consistent. They rely on the force of a sledgehammer blow, which can lead to over-crimping (weakening the metal) or under-crimping (leaving air gaps).
Step 2: Preparing the 2 AWG Wire
Preparation is where most failures begin. To ensure your 2 gauge tinned lug seats perfectly:
- Straight Cut: Use a dedicated cable cutter to ensure the end of the 2 AWG wire is flat. Using a hacksaw or side cutters can deform the cable, making it difficult to slide into the lug.
- Strip Length: Measure the depth of the lug barrel. Strip exactly that much insulation—no more, no less. You want the insulation to sit flush against the base of the lug.
- Clean the Strands: Even if the wire is new, if it isn’t tinned wire, give the copper a quick wipe to ensure no oils or dirt interfere with the metal-to-metal contact.
Step 3: The Crimping Process
Once your wire is inserted into the 2 AWG tinned lug, it’s time to crimp. Follow these professional milestones:
Alignment
Ensure the “palm” of the lug (the flat part with the hole) is oriented in the direction it will eventually be bolted. Once you crimp a 2 AWG wire, the cable is so stiff that “twisting” it into place later can put unnecessary stress on the terminal.
The “Double Crimp” Technique
For 2 AWG lugs with longer barrels, a single crimp may not be enough.
- First Crimp: Position the die closest to the “palm” of the lug.
- Second Crimp: Position the die closer to the wire entry point (the “throat”).
Leave a small gap (about 1/8 inch) between the two crimps to allow the metal to displace without cracking.
Step 4: Testing the Integrity
How do you know if your 2 gauge tinned lug is installed correctly? Professionals use three main tests:
- The Pull Test: Give the lug a firm, aggressive tug. If there is even a millimetre of movement, the crimp is insufficient.
- Visual Inspection: Look for “ears” or “flashings.” If the metal has squeezed out the sides of the die, the die size was likely too small, which can cause stress fractures in the lug.
- Resistance Check: Using a multimeter, the resistance between the wire and the lug should be near zero.
Step 5: Sealing the Connection
Even a perfect crimp on a 2 AWG tinned lug can benefit from environmental sealing.
Adhesive-Lined Heat Shrink is mandatory for professional results. Unlike standard heat shrink, the adhesive-lined variety melts a glue-like resin as it shrinks, creating a waterproof seal that prevents “wicking”—where moisture travels up the inside of the wire insulation and rots the cable from the inside out.
- Pro Tip: Use a 3:1 or 4:1 shrink ratio tubing for 2 AWG wire to ensure it tightly grips both the thick lug barrel and the slightly thinner wire insulation.
Summary Checklist for 2 AWG Crimping
| Feature | Requirement |
|---|---|
| Lug Type | 2 AWG Tinned Copper |
| Preferred Die | Hexagonal |
| Crimp Count | 1 to 2 (depending on barrel length) |
| Sealant | Marine-grade adhesive heat shrink |
By mastering these techniques, you ensure that your high-amperage connections remain cool, conductive, and corrosion-free for years to come. Whether you are building a dual-battery system or wiring an inverter, the humble 2 gauge tinned lug is the anchor of your electrical reliability.